DIY Spinners: Colourful Optical Illusions with Fun Paper Craft

Have you ever been mesmerised by the swirling patterns of a colourful spinner? The magic of optical illusions can be surprisingly easy to create with a simple DIY project. In this blog post, you’ll learn how to make your own vibrant DIY spinners using paper, basic craft supplies, and a touch of creativity. Whether you’re crafting with kids or enjoying a nostalgic throwback to your childhood, these colourful spinners are a fantastic way to explore the science of motion and perception while having loads of fun.
Get ready to watch your designs transform into mind-bending optical illusions right before your eyes!
Why Make DIY Spinners?
DIY spinners are more than just a fun paper craft—they’re a fantastic blend of creativity, science, and hands-on learning. Here’s why you’ll love making them:
- Creative Expression: You can design spinners with bright colours, geometric patterns, or even custom doodles. As they spin, your artwork comes to life in fascinating ways.
- Educational Value: Spinners are a great tool for introducing children to optical illusions and the science behind visual perception.
- Budget-Friendly Fun: With just a few materials—most of which you probably already have at home—you can create hours of entertainment.
- Perfect for All Ages: Whether you’re crafting with young children, tweens, or even as a relaxing adult hobby, making DIY spinners is enjoyable for everyone.
The Magic Behind Optical Illusions
Before we dive into the DIY project, let’s explore why spinners create such mesmerising optical illusions.
When you spin a colourful disc, the rapid motion causes your eyes to blend the individual colours together. This happens because of persistence of vision—the way your brain continues to register an image for a fraction of a second after it disappears. As the colours merge, they create new hues or unexpected patterns, giving the illusion of movement, colour shifts, or even a 3D effect.
For example:
- A spinner with alternating red and blue sections may appear purple when in motion.
- Spirals or concentric circles can look like they’re expanding or contracting.
It’s science and creativity in one playful activity!
Materials You’ll Need
You won’t need anything fancy to make these DIY spinners. Most of the materials can be found in your craft drawer or around the house:
Coloured cardstock or thick paper (white works well for colouring your own designs)
Scissors
Ruler and pencil
Compass or circular object (to trace a circle)
Coloured markers, crayons, or pencils
String or toothpicks (for the spinner handle)
Glue or tape
Optional: Glitter, stickers, or metallic pens for added flair
Creative Design Ideas for Colourful Spinners
The beauty of DIY spinners is that you can personalise them in endless ways. Here are some creative design ideas to inspire you:
1. Rainbow Swirls
Draw thick, curved lines in a rainbow pattern. As the spinner twirls, the colours will blend into a beautiful gradient.
2. Fire and Ice
Create one half with warm colours (red, orange, yellow) and the other with cool tones (blue, green, purple). When spun, the contrasting sides create a fiery, icy illusion.
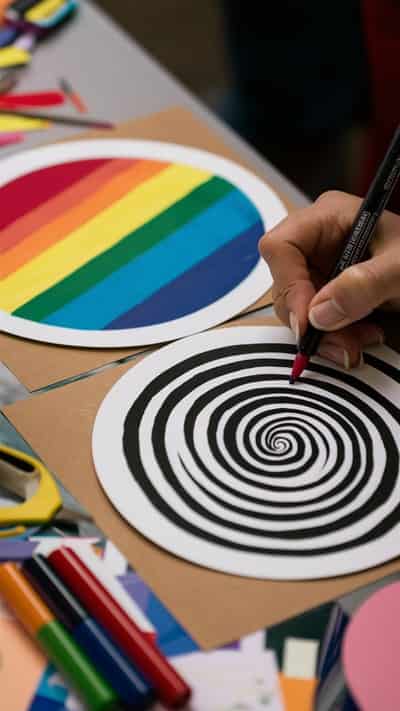
3. Checkerboard or Spiral Patterns
Use black and white sections in alternating patterns. These create dramatic optical illusions, making the spinner look like it’s expanding or changing directions.
4. Polka Dots and Stripes
Experiment with dots, zigzags, and stripes. Simple geometric patterns often create the most surprising effects when in motion.
How to Make Colourful DIY Spinners
Now, let’s get to the fun part—making your own optical illusion spinner! Follow these easy steps:
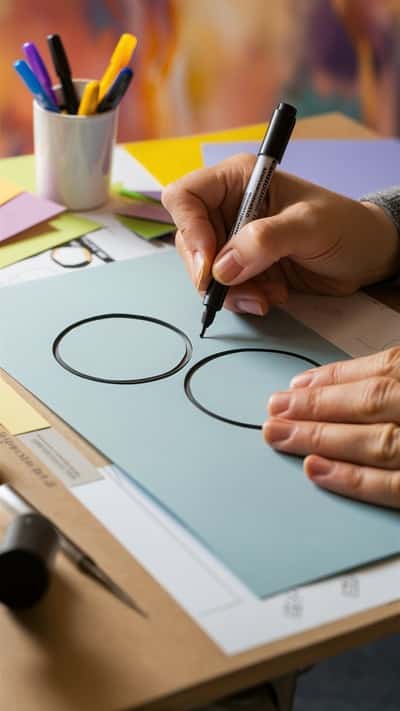
Step 1: Trace and Cut the Circles
- Use a compass or a circular object (such as a glass or jar lid) to trace two circles onto your cardstock or thick paper.
- Cut out both circles neatly with scissors.
- For best results, aim for a diameter of 10–12 cm (about 4–5 inches)—this size is easy to spin and see clearly.
Step 2: Design Your Spinner
- Choose one of the creative design ideas or make your own unique pattern.
- Use bright colours and bold shapes for the best optical effects.
- Let the colours dry completely before moving on.
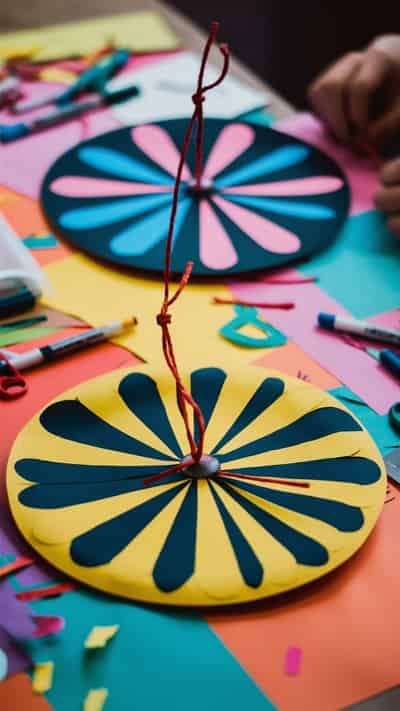
Step 3: Assemble the Spinner
- Place the two circles back-to-back with the decorated sides facing outward.
- Glue or tape them together for sturdiness.
- Poke two small holes near the centre, approximately 1 cm apart.
- Thread a piece of string (about 60 cm long) through the holes and tie the ends together.
Step 4: Spin It!
- Hold the string loops on either side of the spinner.
- Twist the spinner several times, winding the string.
- Pull the string outward and watch your spinner whizz!
- Experiment with different spinning speeds to see how the patterns change.
Fun Ways to Experiment with Your Spinners
Once you’ve mastered the basic spinner, why not take it up a notch with these creative variations?
1. Slow-Mo Spinner Challenge
Use your phone to record your spinner in slow motion. This lets you see how the colours and patterns blend frame by frame—an interesting way to observe the illusion in detail.
2. Magnet-Powered Spinners
Attach a small magnet to the back of your spinner and place it on a magnetic surface (such as a fridge or whiteboard). You can give it a flick to watch it spin freely.
3. Optical Illusion Science Experiment
Create multiple spinners with different colour combinations. Ask kids to predict what new colour they’ll see when the spinner is in motion. This is a fun way to teach about colour mixing.
Get Spinning with This Colourful DIY Craft!
Making DIY spinners is an exciting and creative activity that combines art, science, and play. Whether you’re crafting with kids on a rainy day or making your own batch of spinners for a party, this project offers endless fun and fascinating results. Plus, watching your unique designs transform into mesmerising optical illusions is simply magical.
So, grab your paper and markers, and start spinning your way into a world of swirling colour and creativity!